6
People think you need to spend thousands of dollars to start prepping. You can easily spend tens of thousands – but you don’t have to. You don’t need a $300 survival knife, a closet full of freeze-dried food, body armor, or an elaborate bug-out bag. I mean, those are all nice, but start with the boring stuff: water, food, light, a way to cook off-grid, a way to keep your phone charged, and basic medical supplies.
Those are all things you’re much more likely to need when a winter storm knocks out power for three days, a water main breaks, or stores temporarily run short of something you need. You don’t need to spend a lot of money to get started, you just need to spend it wisely.
One important tip: look for products that can solve multiple problems (such as a power station with built-in flashlight).
Before You Buy Anything: Start With the Right Priorities
If you’re new to preparedness, I’d prioritize your spending this way:
- Water
- Food
- Light
- First aid and medications
- Emergency cooking
- Backup power
- Warmth and shelter
- Communications
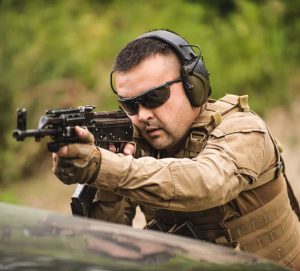
Notice what’s missing – tactical gear. It’s unnecessary when you start off prepping. Build basic resilience first. Then expand.
Your $1,000 goal: Become substantially better prepared for a short-term emergency. You’re not trying to prepare for the collapse of Western civilization. You’re trying to solve the most immediate problems that occur during more likely emergencies.
1. Water Storage
Water would be my first priority, no question. The standard advice is to store about one gallon of water per person per day. I recommend 1.5 gallons per day. Don’t think in terms of drinking water alone. Your household needs can be higher when cooking, sanitation, pets, heat, and other factors are considered. You should calculate your water needs and plan accordingly.
Instead of buying case after case of disposable bottled water, I’d get at least one reusable water container. The Aquabrick is probably my favorite small water container, but it does cost more than other containers.
A seven-gallon container gives one person roughly a week’s worth of drinking-water capacity at that basic gallon-per-day planning level, or provides a useful reserve for a larger household. The Aqua-Tainer has a dispensing spigot and is designed specifically for water storage.
2. Basic Water Filtration
Stored water eventually runs out. That’s why you also need the ability to filter water. While I like hiking-style filters such as the Katdyn, at the beginner level I’d be inclined to get an emergency water straw. These are more affordable and – bonus – they work well for bug out bags, which you’ll eventually want to build.
Practical Survival Reusable Emergency Water Filter Straws, 5-Pack
- CLEAN WATER ANYWHERE: Our water filter straws solve the real challenge of being on the move…
- LIGHTWEIGHT & PORTABLE: Our filters weigh only 2 oz and measure 8 inches long, so you can take…
- HIGH LEVEL FILTRATION: Each of the 5 filters removes over 99.99% of waterborne bacteria (such…
A filter doesn’t magically make every source of contaminated water safe, so learn the limitations of whatever filtration system you buy. Consider adding some low-cost water purification tablets to the mix. They’re low cost, lightweight, and effective at killing viruses.
3. A Headlamp
I use my headlamp all the time. It’s far more useful than a conventional flashlight. I can use both hands freely and the light follows where I’m looking. Try carrying a flashlight while starting a generator, making dinner, repairing something, hauling firewood, or rummaging through a dark basement. Odds are high you’ll hold the flashlight in your mouth. Better to just mount it on your head.
I use a Petzl ACTIK CORE headlamp. I like it because it’s both rechargeable but also accepts AAA batteries. Petzl also has a strong reputation within the backpacker community. The problem is it costs more than many headlamps. The Nitecore rechargeable headlamp will work just fine for someone on just getting started and working within a budget. It’s rechargeable, lightweight, and offers multiple brightness/color-temperature options plus red light.
4. Shelf-Stable Food
Skip the expensive freeze-dried foods entirely when starting out. Go to the grocery store and stock more of the foods you already eat. Buy in bulk when items are on sale. Ideal prepper foods might include:
- Peanut butter
- Oatmeal
- Canned chicken or tuna
- Dried beans
- Rice
- Wheat berries
- Pasta and sauce
Ideally, choose at least some foods that can be eaten without cooking or water – think canned foods. After you have stocked more of the foods you already eat, expand with low-cost foods that have a virtually indefinite shelf life. Make sure to eat and replace the foods as part of your normal household routine.
Store those foods properly. Beans, rice, and wheat berries all store best long-term with Mylar bags and oxygen absorbers.
5. Emergency Cooking
Can you cook a meal after the grid goes down? People with propane or natural-gas stoves and grills may already have options. Others do not. An inexpensive camping stove solves that problem. A simple one-burner stove will work to get started. These are reasonably priced units and they can be used to boil water for purification if needed.
I like the concept of a dual-fuel stove because this model can operate using either butane cartridges or small propane cylinders. That gives you more flexibility when one fuel is difficult to find. This should go without saying, but it’s also easy to overlook – store fuel as well.
6. USB Power Bank
Your phone isn’t just a phone. It’s a flashlight, map, news source, camera, weather radio substitute, communication device, banking portal, and more. Keeping it charged is a preparedness priority. Buy a decent power bank if you don’t already own one. You’ll use it well before any power outage, so it’s a prep that doesn’t sit around waiting for the collapse.
Sale

Solar Power Bank 20000mAh with 4 Panels
- 【20000mAh Large Capacity】Equipped with a high-capacity 20000mAh lithium-polymer battery…
- 【Charge 5 Devices Simultaneously】Supports charging up to 5 devices at once. Comes with…
- 【4-Panel Solar Charging】Features 4 integrated high-efficiency solar panels, capturing…
The low-cost power bank above has built-in solar panels, charging cables, and flashlight. This is particularly useful as it can re-charge with the sun, you won’t have to worry about losing or forgetting charging cables, and you’ll use the flashlight more often than you think. Keep it charged!
8. An Emergency Radio
Your smartphone is tremendously useful… until cellular networks go down or the battery dies. You need other ways to receive information. That’s where a good emergency radio comes in. It’s hard to bring down AM/FM frequencies. But there are other advantages to these radios. They often incorporate emergency flashlights, can be charged with a hand crank, and act as a power bank so you can charge devices off it.
The Midland ER310 receives AM/FM and NOAA weather information and offers several methods of supplying power, including its internal rechargeable battery, a hand crank, and solar charging. I’d still keep spare battery-powered radios around if you already own them. Redundancy matters more than most people think. Remember: two is one and one is none.
The GB40 is a portable lithium jump starter designed for 12-volt vehicle batteries and is rated for gasoline engines up to 6.0 liters and diesels up to 3.0 liters.
9. Sanitation Supplies
This category gets ignored because it’s so boring. Nobody looks cool posing on Instagram with contractor bags. Buy them anyway. I’d stock:
If municipal water or sewer service fails, sanitation can become a problem surprisingly quickly.
10. Improve Your First-Aid Supplies
If you don’t already have a basic household first-aid kit, start building one. I generally advise building your own kits whenever possible because you can personalize it and make sure you’re getting the components you actually need and control the quality of the products. You can also add products as finances allow. That said, I do advise buying a designated medical bag to put it all in. They’re purpose-built bags and they’re easily recognizable. If someone had to grab medical supplies quickly, it’s much faster if the bag is easily identifiable.
I like the Primacare First Responder Trauma Bag for building your own kit. It’s big enough to hold the basics and it’s easily identifiable.
If you want to start with a solid first aid kit, that includes a bag you can add components to, I like the Scherber First Responder Trauma Kit. It’s pricey, but medical supplies often are.
11. Portable Power Station
For someone starting from scratch, a small portable power station provides a useful middle ground between USB battery banks and a gasoline generator. That said, it’s much closer to a USB battery bank than a gas generator. Don’t expect generator-style capacity from a typical handheld power station. Power stations do have advantages over a gas generator, though. They don’t create emissions (carbon monoxide can be deadly and you can’t use gasoline generators in a house), they’re silent, and most can be recharged with optional folding solar panels.
Staying mindful of the $1,000 amount, I’d steer away from more powerful power stations. If your budget allows for them, great! If you’re working on a budget, scale it back to something like the Anker SOLIX C300. It has a built-in light and it’s great for camping. I’ve used one many times while camping and we set it on the picnic table. Kids charge their devices on it and we use the light at night for playing boardgames.
The C300 has a 288Wh battery and 300W continuous output, with higher short-duration surge capability. That isn’t enough to run your entire house. That’s okay. At this stage, I’m interested in powering smaller essential devices:
- Phones
- Tablets
- Radios
- Rechargeable lights
- Some laptops
- Small electronics
- Certain medical or communications equipment within the unit’s limits
The important thing is understanding watts and watt-hours before buying a power station. A device that consumes 1,500 watts cannot be run by a power station capable of delivering only 300 watts simply because both products have the word “power” in the description.
This may be just as important as what I would buy. If you’re starting from zero, I would generally not spend a large portion of that first $1,000 on:
- A giant bug-out pack
- Premium survival knives
- Cases of freeze-dried food
- Elaborate tactical equipment
- Gas masks without a specific threat assessment
- Novelty survival gadgets
- Large solar installations before solving basic problems
- Anything you haven’t taken the time to learn how to use
I’m not saying those things don’t have a place. I’m saying they probably aren’t where you should start. Preparedness should solve vulnerabilities. Buying survival gear because it looks like survival gear isn’t the same thing.
Buying equipment is not the end of preparedness. It’s the beginning.
- If you buy a stove, cook dinner on it.
- If you buy a water filter, use it.
- If you buy a radio, figure out which stations you can actually receive.
- If you buy a power station, determine what it can and cannot operate.
- If you buy a generator, start it periodically.
- If you buy a jump starter, learn where your vehicle’s battery terminals are.
- If you store food, eat and rotate it.
What did I leave off the list or what preps do you think are more important for beginners? Let me know down in the comments.
If you’ve never used your emergency equipment, your first real emergency becomes your training session.
That’s less than ideal.
If money were tight, I wouldn’t worry about reaching the $1,000 level immediately.
I’d build gradually:
First: Store water.
Second: Be able to treat additional water.
Third: Get reliable lighting.
Fourth: Build several days of ordinary shelf-stable food.
Fifth: Get an emergency cooking method.
Sixth: Keep phones and small electronics charged.
Seventh: Expand first-aid and sanitation supplies.
Eighth: Add emergency communications.
Ninth: Prepare your vehicle.
Tenth: Add larger backup-power capability.
Then I’d look for the weak spots.
Maybe you have a month’s worth of food but three gallons of water.
Maybe you own a $2,000 generator and only enough gasoline to run it until lunchtime.
Maybe you own five flashlights and every single one requires a different battery.
Preparedness isn’t about accumulating the most stuff.
It’s about building a system that works.
The Bottom Line
You don’t have to become prepared overnight.
And you don’t have to drain your bank account doing it.
If you have $100, start with $100.
If you can spend $20 this week, spend $20.
Then add another layer next month.
Over time, those layers add up.
More importantly, buy things that you’ll actually use, learn how they work, rotate what expires, and identify your household’s weaknesses before spending money trying to fix them.
A thoughtfully spent $500 can make you far more resilient than $5,000 worth of random survival gear sitting untouched in a basement.
That’s ultimately the goal.
Not owning more survival stuff.
Being harder to disrupt.
Read the full article here