How To Remove Sutures Yourself

Let’s get something straight. In a real survival situation, you are not walking into a clinic with soft music, clean gloves, and a bored nurse who has done this a thousand times. You are alone, possibly injured, maybe exhausted, and definitely running out of time. When you get cut deeply enough to need stitches in a grid down world, the clock starts ticking the second that needle goes through your skin. Because eventually those sutures need to come out, and if there is no doctor to do it, that job falls on you.
People hate talking about this because it is uncomfortable. It is graphic. It makes survival feel a little too real. But that is exactly why you need this skill. Not for today when you can still walk into urgent care, but for tomorrow when society stalls, medicine becomes rare, and you cannot gamble with infection.
This is not a hypothetical. This is a reality check for anyone serious about prepping.
Know When You Should Not Remove Sutures
Most people underestimate how long wounds actually take to heal. The surface can look fine while the inside is still knitting together. If you pull those sutures too early, the wound can split open like a zipper, and then you are dealing with something far worse than the original injury. This is how small mistakes become life threatening problems.
Here is when you should absolutely not remove sutures on your own:
- The wound is still warm or tender to the touch
- You see redness that keeps spreading instead of shrinking
- You notice swelling that comes back after cleaning
- You see drainage, especially yellow or green
- The edges separate when you move or stretch the skin
- You have no clue how many days it has been
Different parts of the body have different timelines. Eyebrows heal fast. Joints heal slow. Deep cuts take far longer than shallow ones. When in doubt, wait. In survival settings, waiting protects your life far more often than rushing.
Gather What You Truly Need
This is where preppers should shine. We stock supplies precisely so we are not improvising with dirty tools at the worst possible moment. But even then, people skip steps or think, “I will just sterilize this knife over a flame like the movies.”
Do not do that. Heat can warp the blade and does almost nothing for bacteria trapped in microscopic cracks.
Here is the real list:
- Clean water or saline, not muddy creek water
- Iodine, chlorhexidine, or alcohol
- Tweezers with a fine tip
- Small scissors or specialized suture scissors
- Gloves, preferably nitrile
- Antibiotic ointment
- Gauze, non stick pads, or sterile cotton
- A clean towel or surface to work on
- A light source bright enough to actually see what you are doing
In a crisis, your tools can be the difference between a clean removal and a wound that goes septic within hours.
Clean Like Your Life Depends On It
Because it does. Most people do not understand how fast bacteria can invade a wound that is already compromised. Even a tiny mistake here can lead to infections that spiral out of control.
Start with hand washing. Scrub your hands. Get under the nails. Dry with something clean. Then glove up. Clean around the wound with antiseptic. Let it dry. Do not rush, because wet antiseptic is not as effective as dry.
If hair is in the way, trim it carefully. Do not shave. Shaving causes micro cuts that bring in more bacteria.
Prep the surface like you are performing a small surgery, because you are.
Removing Sutures Step By Step, Slowly and Correctly
This is where precision matters. Your hands might shake, you might be nervous, but the process is simple if you follow it exactly.
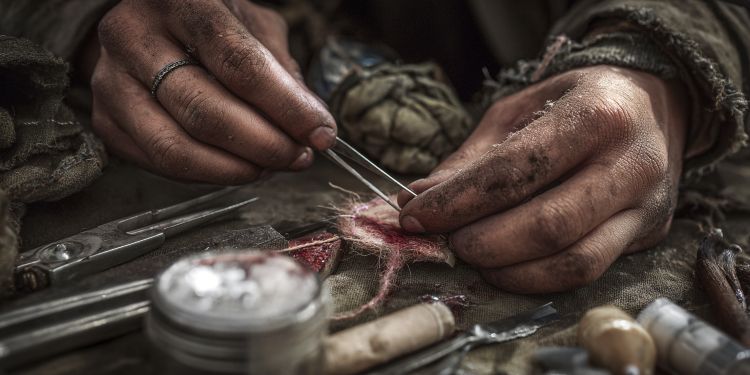
- Use your tweezers to gently lift the knot. You are not yanking it. You are just raising it so you can see where the thread enters the skin.
- Slide your scissors under the suture and cut the thread as close to the skin as possible. If you cut too high, you drag contaminated outside thread back through the wound. That brings bacteria inside where it does the most damage.
- Pull the knot upward in one smooth motion. If you feel pulling or tearing, stop immediately and adjust your angle. Do not force anything.
- Keep removing each suture one by one. Go slow. Wounds do not always heal evenly. Some stitches will feel looser and others will resist. Patience wins here.
- Once all sutures are out, clean again with antiseptic. Your wound is freshly exposed and vulnerable.
- Apply a thin layer of antibiotic ointment. Not too much. More is not better. Thin and even.
- Cover the area with sterile gauze and secure it in place.
Aftercare: Watching for the Silent Killers
People think the hard part is cutting the stitches. They are wrong. The real danger starts after the removal. A wound that is almost healed can go south fast if you do not watch it.
For the next two days you need to check for:
- Increasing redness
- Heat radiating from the skin
- Hard swelling
- New discharge
- A smell that was not there before
- Fever, chills, or fatigue
If you see red streaks running outward from the wound, that is blood poisoning. That is an emergency in any world, especially one with no hospitals.
What To Do If the Wound Starts To Open
This is the nightmare scenario. But it does not mean panic. Stay calm. Assess the opening. If it is minor, you can support it with butterfly closures or Steri Strips. Make sure the skin edges meet neatly. Never force them.
If the wound opens wide or starts bleeding again, you may need to keep it clean and allow it to heal by secondary intention, which takes longer but is safer than trying to re stitch a contaminated wound. Re stitching without sterile tools and skill can trap bacteria deep inside.
Clean it. Keep it covered. Change the dressing daily.
The Mindset That Keeps You Alive
Removing sutures yourself is not about bravery. It is about readiness. When society falters, when clinics vanish, when bandages run out and doctors are miles away, knowledge becomes the most powerful tool you have. With the right skills, you can step up and protect yourself and the people who rely on you.
You never want to be in the position where you say, “If only I knew how to do this.”
Learn now. Practice now. Prepare now.
Final Thoughts
Suture removal is not glamorous. It is not comfortable. But it is essential. When the world around you becomes unstable, medical self reliance becomes priceless. Infection, reopening wounds, and poor technique are real threats, but with proper preparation and skill, you can do this safely.
Being ready means understanding reality, not Hollywood drama. This is survival. This is discipline. This is taking back control when systems fail.
Presenting The Home Doctor
If you want to take your medical preparedness to the next level, The Home Doctor is one of the most practical survival medical guides you can own. It teaches you step by step how to handle real emergencies when no professional help is available. From treating infections and cleaning wounds to handling deeper injuries and illness in a grid down world, this book gives you clear instructions anyone can follow. When modern medicine becomes a luxury, The Home Doctor becomes your lifeline.
You may also like:
 How To Clean a Wound (Before It Gets You Killed)
Is a 3-Letter Agency Tracking You Right Now? (VIDEO)
Activated Charcoal for Naturally Healing Wounds
The Home Doctor: Book Review
How to Make Feminine Hygiene Products at Home
Read the full article here


