Condensed Milk Canning Mistakes You Need to Avoid

Canning condensed milk is a wonderful way to keep this sweet and creamy ingredient on hand for your favorite recipes, whether it’s for baking, your morning coffee, or homemade desserts. However, the canning process requires careful attention to detail to avoid common mistakes that can affect both the quality and safety of your preserved milk.
Whether you’re new to canning or have some experience under your belt, understanding these pitfalls is key to ensuring your canned condensed milk turns out just right. Let’s explore some of the most common canning mistakes, what can go wrong, and how to make sure your canned milk is perfect every time.
Improper Sterilization
Sterilization is absolutely crucial when it comes to safe canning. Skipping or rushing this step can lead to contamination, which might cause your condensed milk to spoil or even become unsafe to consume. One frequent mistake is not boiling the jars and lids long enough.
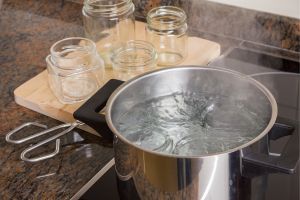
 To keep things safe, make sure to submerge your jars and lids in boiling water for at least ten minutes before you start.
Keep them hot until you’re ready to fill them to prevent any cracks from sudden temperature changes.
Also, keeping your workspace clean is essential.
Always wash your hands thoroughly and ensure that all surfaces and utensils are spotless to minimize the risk of introducing any unwanted bacteria. Don’t forget to check your jars and lids for any cracks or defects, as damaged jars can ruin the sealing process and let bacteria in.
Incorrect Sealing Techniques
Getting that seal right is vital to keep your canned condensed milk airtight and free from bacteria. A common error is not following the manufacturer’s instructions for sealing each type of jar and lid. Different brands might have specific guidelines, so it’s important to stick to them carefully.
Related: The Biggest Enemies of Long-Term Food Storage (It’s Not Looters)
Another issue often arises from improper headspace—the little gap between the top of the condensed milk and the jar lid. Generally, a half-inch of headspace is recommended. This space allows the milk to expand during processing and helps ensure a good seal.
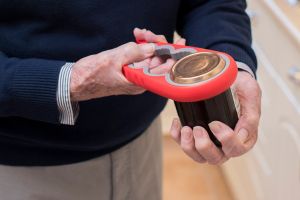
After processing, take a moment to check the seals by pressing the center of each lid. If it doesn’t move up and down, you’re good to go. If it does, refrigerate that jar and use the contents soon to avoid any spoilage.
Inadequate Storage Conditions
 Even if you’ve canned your condensed milk perfectly, storing it improperly can still lead to quality issues over time. Fluctuating temperatures can make the milk too thick or cause crystals to form, while high temperatures can speed up spoilage. To keep your condensed milk in the best shape, store your jars in a cool, dark place away from direct sunlight and heat sources.
Consistent storage temperatures help prevent condensation inside the jars, which can lead to mold growth. Also, avoid freezing your condensed milk, as this can change its texture, making it grainy or causing the fat to separate from the liquid.
Potential Problems and Troubleshooting
Contamination is one of the most serious issues you can encounter when canning. Look out for signs like off smells, unusual discoloration, or visible mold growth. If you notice any of these, it’s best to discard the jar immediately to stay safe.
Another common problem is jar breakage, often caused by thermal shock; putting cold jars directly into boiling water can make them crack or even shatter. To prevent this, always bring your jars to room temperature before processing and avoid sudden temperature changes. Overfilling jars can also create too much pressure, leading to breakage. Make sure to leave the recommended headspace to avoid this issue.
Sometimes, your condensed milk might become too thick. This can happen if you overcook it or use too high processing temperatures. To prevent this, keep a close eye on cooking times and regulate the heat during processing. Using a timer can help you stay on track and maintain steady heat to achieve the perfect consistency without compromising the texture.
Best Practices for Successful Condensed Milk Canning
Getting your canned condensed milk just right involves following a series of steps carefully. Here’s a straightforward, step-by-step guide to help you through the process:
1. Gather and Prepare Your Equipment
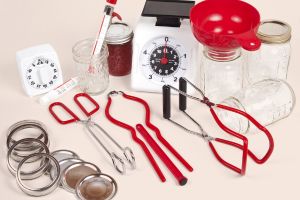
 Start by collecting all the necessary equipment: canning jars, lids, a large pot or canner, a jar lifter, and a funnel. Inspect each jar for any cracks or chips and toss any damaged ones to prevent breakage during processing. Wash the jars and lids thoroughly with hot, soapy water, then rinse them well to remove any soap residue.
2. Sterilize the Jars and Lids
Sterilization is your first crucial step. Place the clean jars and lids in a large pot of boiling water, making sure they’re fully submerged. Let them boil for at least ten minutes. Keep the jars hot until you’re ready to fill them to avoid thermal shock, which can cause them to break.
3. Prepare the Condensed Milk
Use high-quality condensed milk for the best results. If you’re making your own, follow a trusted recipe to ensure the correct consistency and safety. Measure the milk accurately to maintain the proper ratios during canning.
4. Fill the Jars
Using a funnel, carefully pour the condensed milk into the sterilized jars, leaving about half an inch of headspace at the top. This space is important for expansion during processing and helps ensure a proper seal. Wipe the rims of the jars with a clean, damp cloth to remove any spills or residue that could interfere with the sealing process.
5. Apply the Lids and Rings
 Place the sterilized lids on the jars, making sure they sit flat against the rim.
Screw on the metal bands just until they’re fingertip tight.
Avoid over-tightening, as this can prevent the lids from sealing properly during processing.
6. Process the Jars
Submerge the filled jars in a boiling water canner or a large pot with a rack to keep them off the bottom. Ensure that the water covers the jars by at least one inch.
Related: How to Can Bone Broth at Home for 2+ Years Shelf Life
Bring the water to a rolling boil and process the jars for the recommended time, typically around 15 minutes for condensed milk. If you live at a higher altitude, you may need to adjust the processing time accordingly.
7. Remove and Cool the Jars
Once processing is complete, carefully remove the jars using a jar lifter and place them on a towel or cooling rack. Let them cool undisturbed for 12 to 24 hours. During this time, you should hear the lids “ping” as they seal, indicating that they’re airtight.
8. Check the Seals
After the jars have cooled, check the seals by pressing the center of each lid. If the lid doesn’t flex up and down, it’s sealed properly. Any jars that didn’t seal should be refrigerated and used promptly. Don’t forget to label each jar with the date of canning and store them in a cool, dark place.
9. Store Properly
 Proper storage ensures your canned condensed milk stays fresh and delicious. Keep the jars in a cool, dark area away from direct sunlight and heat sources. Regularly check your stored jars for any signs of spoilage or seal failure, such as bulging lids or unusual odors, and discard any compromised jars immediately.
Canning condensed milk is a rewarding way to keep a sweet and creamy staple ready for your culinary needs. However, avoiding common canning mistakes is essential to ensure your preserved milk remains safe and delicious.
By focusing on proper sterilization, mastering sealing techniques, and maintaining optimal storage conditions, you can prevent issues like contamination, jar breakage, and texture problems.
Following best practices and being prepared to troubleshoot common challenges will boost your canning success.
With careful attention and adherence to guidelines, your canned condensed milk will be a reliable and tasty addition to your pantry for months to come.
You may also like:
 Backup Heaters You Can Buy for This Winter
Cheap and Easy Way to Build a Root Cellar in Your Backyard (Video)
11 Best Military Surplus Items Under $20
EMP Survival Stockpile: What Are You Still Missing?
How Much Does a Nuclear Bunker Cost?
Read the full article here


