Best Hot Tents, Tested and Reviewed
We may earn revenue from the products available on this page and participate in affiliate programs. Learn More ›
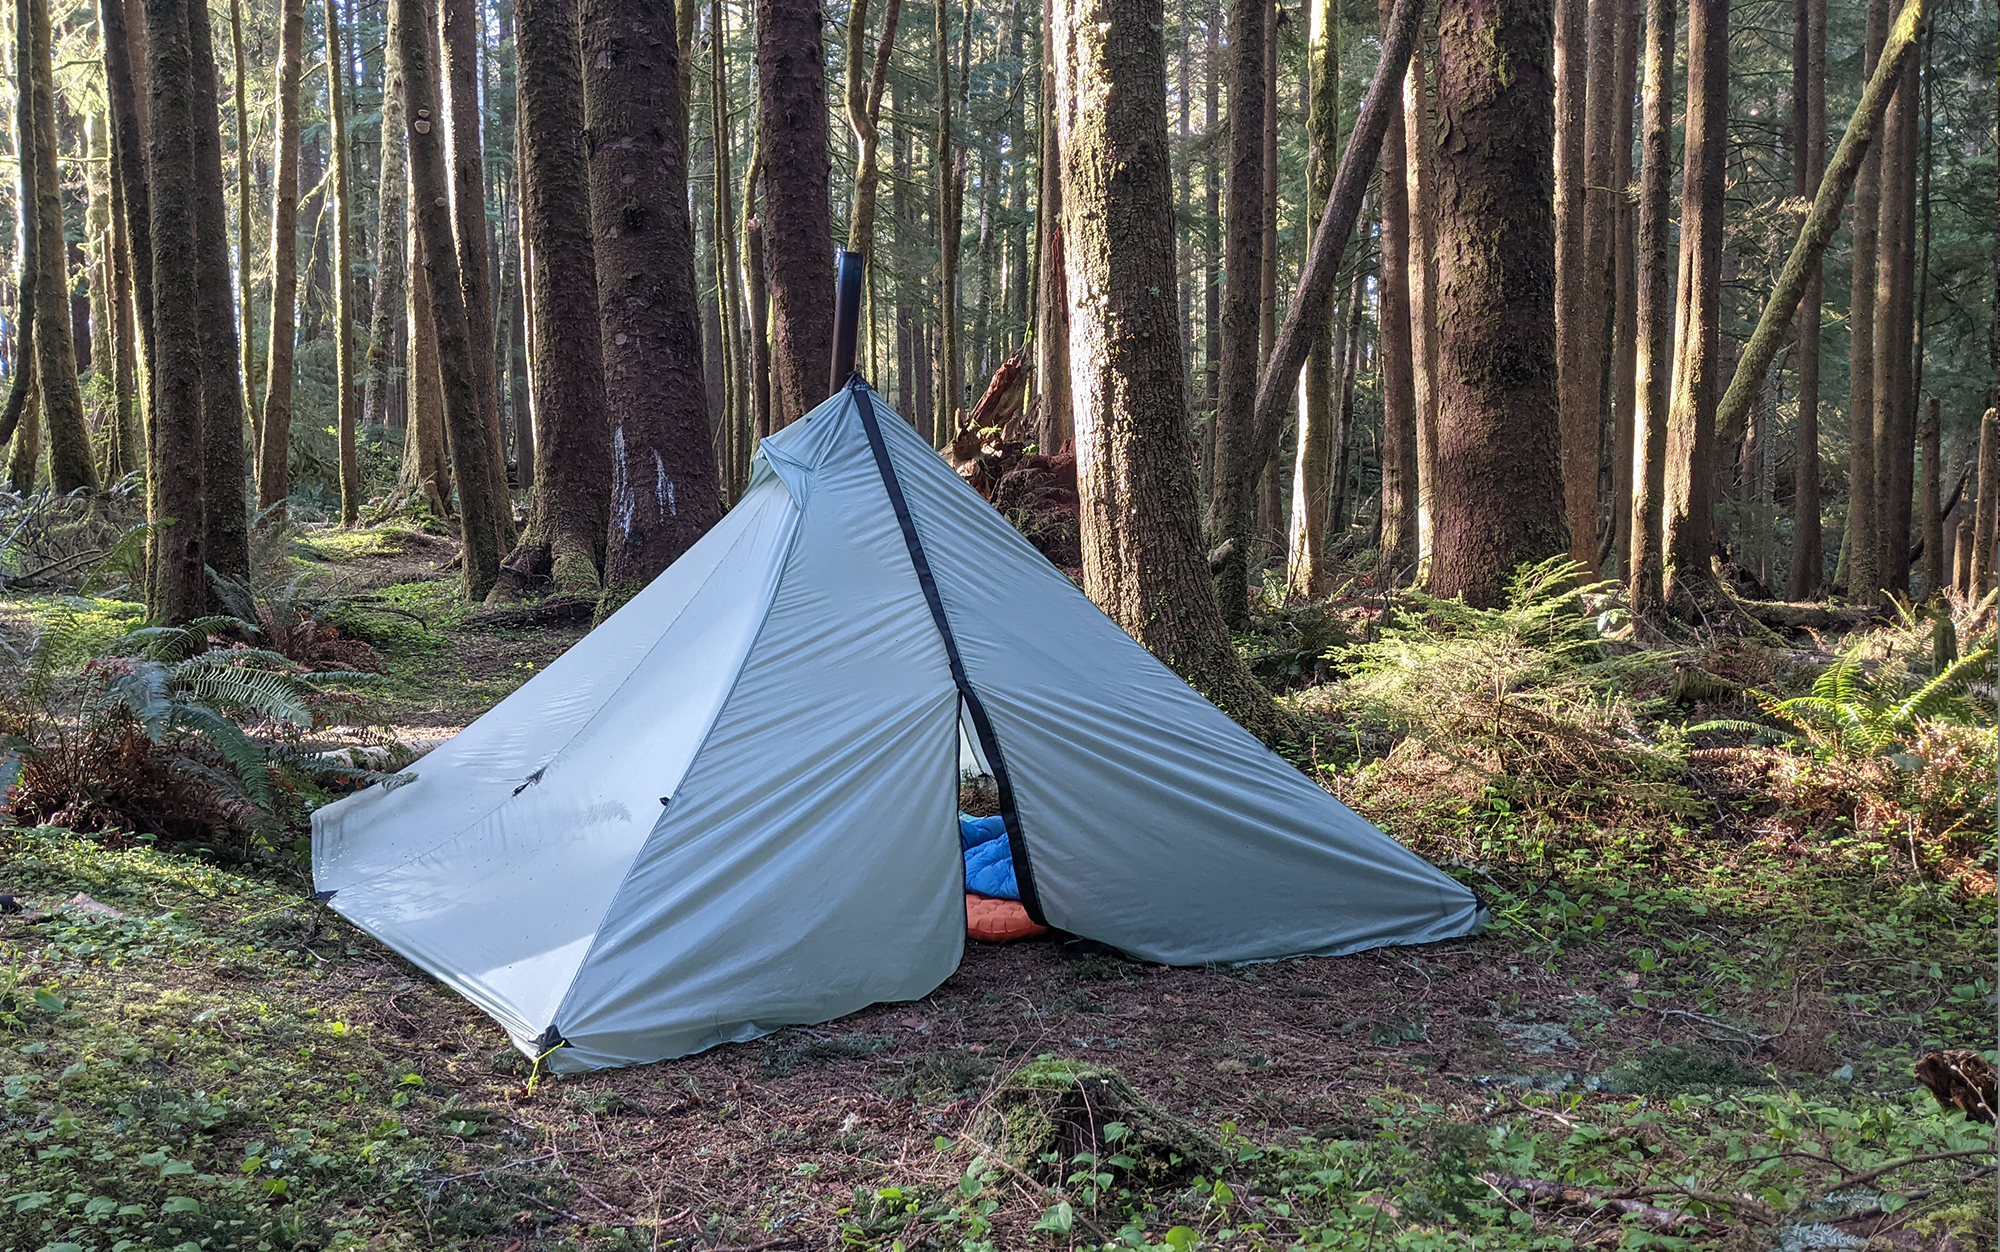
What if I told you that the advent of fall’s freezing rains doesn’t need to be the end of your camping season. Hot tents, or tents that are compatible with a wood-burning stove, are the best way to enjoy the outdoors during short days when temps dip below freezing. We tested the best hot tents, from Nortent, Springbar, Seek Outside, and Snowtrekker in classic foul-weather Pacific Northwest conditions and the freezing Utah desert to see just how well they worked.
How I Tested the Best Hot Tents
I tested hot tents in the Pacific Northwest, overnight, during shoulder season conditions. The Seek Outside Cimarron was tested as part of ultralight backpacking gear test in April along the Oregon Coast, with overnight rain and temps dropping down into the forties. Both the Nortent Gamme and the Snowtrekker Shortwall were tested in late fall in the foothills of the Cascade Range in Washington State. Both testing weekends saw substantial overnight rain and temperature drops into the upper thirties. Assistant gear editor Ashley Thess tested the Springbar Skyliner on a below-freezing overnight in the West Desert of Utah.
The tents were assessed for packed size, ease of use, and functional interior space. The stoves were also assessed for packed size and ease of use, with an eye toward how much fuel they needed to warm the tent up and how easy it was to get airflow moving the right way so that smoke didn’t accumulate inside the tent.
Best Hot Tents: Reviews & Recommendations
Best Overall: Nortent Gamme 6
Laura Lancaster
Buy the Tent from Nortent
Pros
- Simple to set up with a highly weather resistant exterior
- Dual entry and exit options
- The best stove of any tent I tested
Cons
- Difficult to maximize the interior space, especially with the inner tent
- Learning curve with the stove
Key Tent Features
-
Weight:
16.8 pounds -
Material:
Cotton, polyester, nylon, aluminum (poles) -
Add Ons:
Floor, inner tent, gear pockets
Key Stove Features
-
Weight:
37.5 pounds -
Material:
Stainless steel - All packs into one bag
Buy the Tent from Amazon
Buy the Stove from Nortent
The Nortent Gamme 6 was the package deal. Straightforward and easy to set up. Excellent protection against all manner of weather. And the best stove, in terms of ease of use, functionality, and aesthetics. Whether you are looking for a hunting base camp or trying to extend your camping season into the fall months and beyond, this is an excellent choice.
Even just out of the box, the quality of the build of the Nortent was evident. Both the tent (left in the above picture) and the stove (right) came in their own carry sacks, making them easy to transport. Assembly was straightforward, with color-coded poles fitting into sleeves, and secured at the base in a crisscross design for increased stability in foul weather. One aspect of the design that I appreciated is that the Nortent Gamme 6, similar to other tents from European manufacturers that we’ve tested, has the poles connect to the exterior shell (what American manufacturers would refer to as the rainfly but here is thick canvas). Then you can head inside your tent and stay dry while you clip together the inner tent lining.
The stove was also a breeze to set up. The pipes come in separate pieces that fit inside the body of the stove for transport, while the legs fold down from the outside. This was easily the fastest stove to set up of any that I looked at, and, aesthetically, it is beautiful. There is tempered glass on three sides of the stove, allowing you to monitor the coals without having to open the door to check. It’s very pleasant to look at, as if you are sitting around a campfire inside your tent. The Nortent Stainless Steel Stove also comes with a grate, so that the intake air can flow above and below the wood as it’s burning.
The other stoves I tested had a straightforward design: door on one side, with some air intake holes you could open and close. The stove interior was simply a box with a hole in the back for the stovepipe. Maybe it had a flue. But the Nortent stove was different, with a second sheet of stainless steel (baffle) below the stovepipe outlet running almost to the front of the stove. The primary benefit of this design is that the hot air has to travel a longer distance as it snakes its way toward the stovepipe, dispelling more warmth into your tent as it goes.
To help you even further maximize its heating potential, you can open a second set of air intake valves at the top of the stove so that the smoke fully combusts (even more heat) before exiting the stove pipe. That means you need less fuel while getting a cleaner burn and generating more heat. It’s a very effective design: On the night that we tested this tent and stove setup, we burned a small packet of kindling and were plenty cozy. It was also the only stove I tested that I didn’t have to “burn in” once before taking out into the field.
The catch is that it takes some getting used to. Hot tent wood-burning stoves should be heated up slowly at first, as until the stove pipe itself has started to warm up some, the negative pressure created by the cold air outside the tent will prevent the smoke from exiting the stove pipe efficiently. Instead, the smoke buildup inside the stove will try to escape by any means necessary out the air intake holes or even the seams of the stove itself.
While trying to get the hang of this stove, I twice smoked myself out of the tent entirely. I would be very cautious about opening up that second set of air intakes on the top of the door (my initial error), as the smoke is traveling toward the top of the door as it journeys toward the stovepipe. But once you get the hang of it, it’s intuitive and works well.
While I tested the Nortent with the inner tent accessory, I would recommend most individuals purchase a floor instead. The size and shape of the inner tent combined with the dome shape of the tent itself overly restricts your usable space. There was too much space in the inner tent for our gear, and not enough outside of it to put our chairs next to the stove. We also found that it was more difficult to create a cross breeze inside the tent, as the inner tent blocked access to the door on the opposite side. But this is a minor quibble, easily solved by opting for the floor accessory instead of the inner tent.
Best American Made: Springbar Skyliner
Ashley Thess 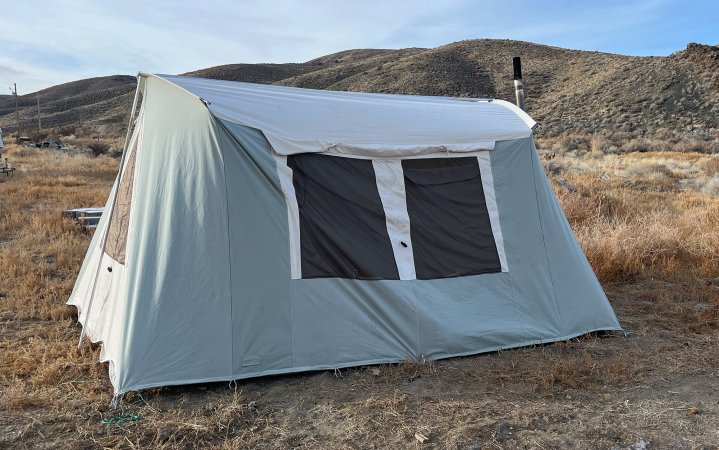
Buy the Tent from Springbar
Pros
- Spacious
- Straightforward setup
- Quality and easy to use stove
Cons
- Heavy
- Expensive
- Large packed size
Key Tent Features
-
Weight:
97 pounds -
Materials:
Cotton (body), steel (poles)
Key Stove Features
-
Weight:
33.7 pounds -
Material:
Stainless steel -
Add Ons:
Stove water tank, oven, and table
Buy the Stove from Amazon
In our review of the best canvas tents, I wrote a love letter to the Springbar Traveler, a USA-made 10 by 10 canvas tent that makes every car camping trip feel like glamping. The Skyliner is the Traveler’s hot big brother. This 10 by 14 canvas tent is wood-stove compatible with medium or large Winnerwell stove kits. The extra 40 square feet of living space in this tent is great for giving the stove enough berth and room to hang around and stoke the fire.
Springbar maximizes the interior space of this tent with straight walls, 6-feet and 5-inches tall anywhere you stand. Because this tent is 14 feet long, it’s recommended that you also stake out the front or back of the tent for optimal width and extra stability. You can see by the less than perfect silhouette in the above photo, that I skipped that step on this excursion.
A velcro-lined flap on the side of the tent allows you to insert the stove jack panel, or you can leave the canvas in place (or use an included mesh panel for a bonus window) and use this as a normal canvas tent big enough for the whole family. It sleeps up to eight adults. The stove itself is easy to set up and use. The chimney is constructed of four sections of straight pipe (one with a spark arrestor, one with air-flow control, and a triple-walled piece to pass through the flashing) and a 45-degree angle piece.
Three windows and a handsomely twisted air control knob adorn the stove so you can enjoy the fire’s ambiance as well as the heat. I started a low and slow fire that grew into a nice blaze, working through hardwood at a slow and steady pace. Every two hours you should expect to feed the fire, if you want it to continue to burn while you sleep. The Winnerwell kit includes a fireproof carbon fiber and aluminum foil mat that can’t withstand a hot pot, but will protect the seamless vinyl floor from stray coals or sparks. Winnerwell offers additional stove accessories like a water tank for melting snow, an oven for making nachos, and a fireguard stove table.
This is a bomb-proof tent with incredible heat retention, breathability, and aesthetics. With the stove, you get the entire package to camp, overland, or hunt from all year long. The included and attached floor is completely waterproof while the canvas walls are watertight. Three no-see-um mesh windows and the full-length door provide great ventilation.
This tent shines as an all-season shelter that will last you decades, and with proper care, generations. Springbar backs their tents with a satisfaction guarantee and repairs any tent you purchase from them in a Salt Lake City, Utah, based sew shop. When I toured their facility, they were repairing a tent from the 70s. If the USA-made Skyliner is too steep for your price range, but you’re already in love with the idea of hot tent camping, Springbar offers the Classic Jack 140, an imported model, for $1,099. It still features the classic Springbar design, customer service, and stove jack compatibility, but it’s made overseas.
While this is an investment in years of all-season camping, it’s also an investment to store and erect such a mighty tent. While the set-up is straightforward, and it can even be done by just one person, it involves some elbow grease. It’s not free-standing, which means you first have to hammer in 23 12-inch galvanized stakes. The hard part is over, and you tension the roof with three aluminum poles reinforced with steel and raise it up on either end. Then, connect the pipes for the chimney and connect it to the stove.
The best part of the Skyliner is also its downside: the extreme size. The packed size shouldn’t be underestimated: 32 by 18 inches for the tent and 56 by 9 inches for the poles. The weight breaks down to 56 pounds for the tent body, 31 pounds for the poles, and 10 pounds for the stakes. This tent is a beast, and add on the 37-pound stove and chimney pipes.
I set up and took down this tent with one other person for an overnight and though it only took us 30 minutes each go, the physical effort of unloading, staking, and assembly takes a toll. This tent is worth the set-up for a long weekend, week-long trip, or semi-permanent camp. But I wouldn’t plan on lugging it out for overnights or two-dayers unless you have more helping hands or can’t live without that toasty fire tucked inside your home away from home. —Ashley Thess
Best for Backpacking: Seek Outside Cimarron
Buy from Seek Outside
Pros
- Tent sets up lightning fast
- Surprisingly lightweight and compact
- Possible to fit four people plus a stove if you are very careful
- Excellent stakes included
Cons
- Stove must be assembled and reassembled each time, with a number of small, easy to lose parts
- Smaller models of the stove do not fit typical firewood
Key Tent Features
-
Weight:
3.5 pounds -
Material:
Nylon -
Add Ons:
Screen doors, seam-sealing, carbon pole, and inner tent
Key Stove Features
-
Weight:
2.8 pounds -
Material:
Titanium
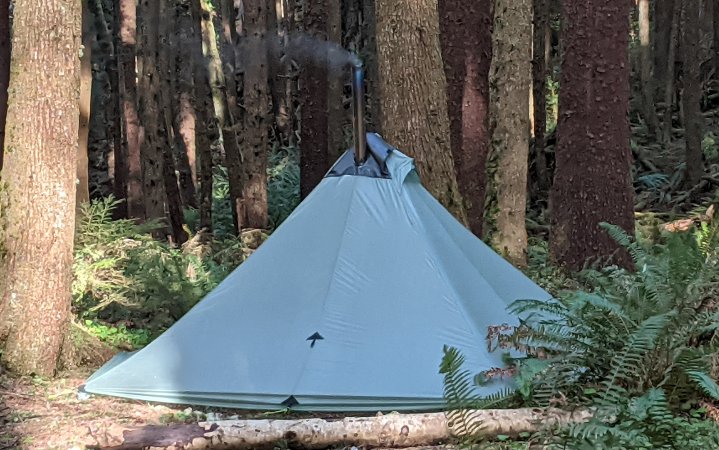
The Nortent Gamme 6 and the Snowtrekker Shortwall are surprisingly lightweight and compact for what they are, but they are still classic camping tents. You would not want to take these on any kind of trek into the backcountry. The Seek Outside Cimarron, is not only lightweight enough to carry into the backcountry, it could even be considered ultralight if you were splitting the weight with multiple other people. That’s a game changer for backpackers who are used to calling it quits when the seasons shift.
I first slept in this tent as part of the Outdoor Life test of the best ultralight tents, and was surprised at how quickly it set up. Once I found a suitably large spot (easily the most time-consuming part of the process), I had it up in only a couple of minutes. The first step is to stake out the four corners of the tent, a task made easier by the long (almost 10 inches) twisted aluminum stakes. Then simply assemble the pole sections together at the lowest length setting, position it in the center of the tent, and adjust it up until it’s at its highest setting.
The titanium stove, however, is much harder to assemble. To get it small enough to fit into a typical backpacking backpack, it breaks down into six different pieces for the stove body, as well as four pegs for the legs and screws to hold it all in place. That’s a lot of pieces to keep track of, and you’ll want to do a thorough accounting to make sure you have everything when heading out into the field and packing up to head home.
The stove pipe itself is, fortunately, a little bit easier to manage. It’s essentially a flat, thin piece of titanium that rolls two ways: short-ways to pack away for travel, and long-ways to roll up as your stove pipe. Rings hold into place whichever configuration it’s in. This is time consuming to set up, and because these are thin pieces of titanium, it does take some care in handling so that it doesn’t get bent out of shape. But, trust me, it’s worth it.
Because this one is made out of thin pieces of titanium, rather than thicker slabs of stainless steel, it conducts heat remarkably well. Just burning a few twigs inside of it will noticeably warm up the inside of your tent.
Best Budget: White Duck Regatta Bell
Laura Lancaster 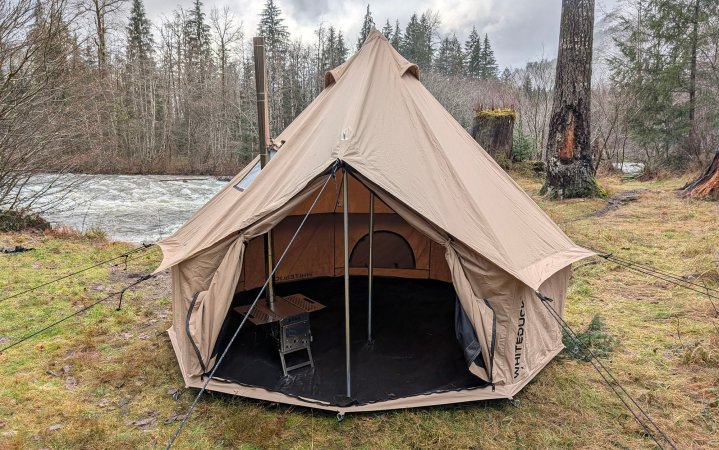
Buy from White Duck
Pros
- Less expensive
- Great headroom
- Good ventilation
Cons
- Requires over a dozen stakes
- Numerous guylines represent a tripping hazard
- Tarp floor is not suitable for a stove (needs a heat mat underneath)
Key Tent Features
-
Weight:
51 pounds -
Materials:
Cotton canvas
Buy from Amazon
The upfront cost to a hot tent setup is serious. You not only need a stove, but also a tent that both has a stove jack and is designed to handle the intense heat these stoves can generate. Realistically, you should expect to end up spending somewhere between $1,500 and $2,000 for a quality setup.
Which is why the White Duck Regatta Bell stood out during testing: It’s about half the price as other options like the Nortent or Springbar. So how does it compare?
This was my second time setting up a bell tent, so I was reasonably familiar with the ins and outs of their setup. What you need to know about it is that there are a ton of stakes, and they are all essential to a proper setup. I was fortunate to find basically the ideal ground for this kind of tent — pliable to get a stake into, but firm enough that it’s not going to come out, but this is not a tent that you’re going to want to set up on ground compacted by cars, or similar. Fortunately, White Duck does provide a stake hammer that is helpful for getting the stake into overly firm ground.
My other complaint about bell tents is that they have a ton of non-negotiable guylines that extend 6 feet or more from the tent. In the case of the White Duck Regatta Bell, this included one that extended out from the door. Now, this isn’t an issue if you’re careful, but if you get up in the middle of the night for a bathroom break, make sure you don’t trip on the guylines coming back in. Making matters worse in this case is that the guylines are black, rather than a more visible color like orange.
Where the White Duck Regatta Bell really stood out was in its interior space. Even with the stove set up inside, there was plenty of room for me (5-foot-5) to stand up and walk around. It’s not quite at the level of the Snowtrekker Shortwall, but it’s close. The 10-foot version would be more than enough space for two people — you could easily squeeze in four along with the stove if you don’t mind being just a little cozy.
One aspect of this tent that I didn’t appreciate until I was using it as a hot tent was the low-lying windows. While to my mind this makes no sense when used as a regular tent (what kind of view are you getting?), for a hot tent they’re perfect. Since heat rises, you get maximum air flow with minimal heat loss.
One unfortunate aspect of the White Duck Regatta Bell tent is that it comes with a tarp floor. I was (fortunately) able to get away with testing this tent with the stove’s legs (Nortent’s stainless steel option in this case) placed directly on the tarp, but you absolutely do not want to do this as a regular practice as it’s going to melt the tarp. In fact, just trying to adjust the legs of the tent ended up scratching the tarp. Pick up a heat-resistant stove mat to place underneath it.
At present, White Duck does not make their own stoves, or suggest one that is particularly compatible with their tents. Snag another option on this list to pair with it — I recommend the Nortent Stainless Steel Stove or one of the Winnerwell options.
Snowtrekker Shortwall
Laura Lancaster 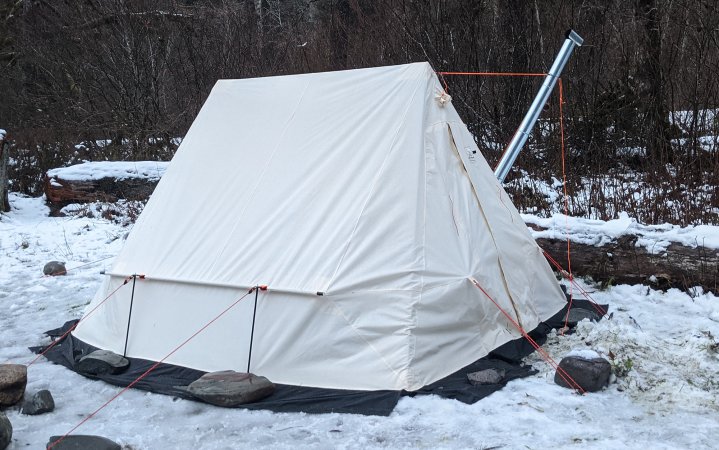
Buy the tent from Snowtrekker
Cons
- Somewhat complicated tent setup
- Stove was fairly difficult to set up (but not to use)
Key Tent Features
-
Weight:
19.1 pounds -
Material:
Cotton -
Add Ons:
Carry bag, floor, window, additional door, mosquito netting, stove jack hole cover
Key Stove Features
-
Weight:
22 pounds -
Materials:
Cold-rolled steel
Buy the Stove from Snowtrekker
One problem with most hot tents is that the stoves need to be centrally located in the tent. This breaks up the interior space, often turning what should be a four-person tent into something that only two people can realistically use. The Snowtrekker Shortwall was a notable exception to this trend: It has the stove tucked away in the front left corner of the tent. This design meant that even though it had a smaller interior footprint than the Gamme 6, it had a much roomier interior feel, an effect aided by the tent’s overall design.
This tent had one of the most unusual setups of anything I’ve tested. It starts with a sawhorse-type pole construction. Two legs are positioned into an orange joint, with a third pole coming out the side; it connects on the opposite end with another orange joint and two more legs. None of these segments locked into place, so you have to be a bit careful when assembling them — it twice fell down on me while I was putting it together. After you get it up, you then throw the canvas body over the top (don’t be surprised if the pole segments fall apart a bit during this step, too). Once it’s over and positioned, the four pole ends at the bottom of the sawhorse slip into the corners of the tent, which finally creates enough tension to keep the whole thing together.
Three more poles are positioned horizontally through sleeves on the sides and the back of the tent, with shorter poles connecting to the base to create the vertical walls: This part works well and goes faster than you expect. Because this tent could be described as semi-freestanding, you do need to figure out how to create tension between the guylines using stakes. If it’s still early in the season, you should be able to stake directly into the ground (although plan to bring your own stakes, as the beefy military ones supplied by Snowtrekker are less effective at piercing the ground than other models).
Conversely, if the ground is covered in snow, you can simply pile snow on top of the stakes. However, if the ground is frozen or otherwise impenetrable, but without the benefit of heavy snow, you’ll need to Macgyver things a bit. I used rocks to hold the stakes in place which worked well enough to set up the tent.
Once the tent is set up, you can move onto the stove. The body of the stove itself is fairly straightforward: simply unfold the legs and you’re in business. The stove pipe is a bit trickier. The pieces nest together in a narrowing concave shape; however, I found that in practice they didn’t always fit together, or come apart, very easily. Snowtrekker recommends you use work gloves when fitting the parts together, too, as the sharp edges can cut your hands. (I did not wear gloves and can confirm that they will in fact cut your hands).
Further complicating matters is the adjustable stove pipe piece, which allows you to swivel the direction of the stove pipe so that it’s pointed at a 45-degree angle out the side of your tent. In theory, I like the versatility of this, as it gives you more control on the orientation of your stove; in practice, this piece was difficult to adjust and, after much swearing, I ended up settling for a so-so orientation in the tent.
Fortunately, the interior space of the Snowtrekker Shortwall is so generous that it doesn’t matter. Between the off-set positioning of the stove and the vertical side walls of the tent body, this tent easily had enough room for four adults to sleep inside of it, and still have plenty of space for a couple of the best backpacking chairs. Two people were practically swimming in it. I also found that the vents at the top of the tent did a remarkably good job of allowing for air transfer across the body of the tent, even when we were first getting the fire going in the stove and it was a little smoky.
One final quibble I have about the Snowtrekker is that they do not include a carrying bag in the purchase price, for either the stove, or the tent itself. Between the canvas body, pole bag, tent stake, and ground sheet (sold separately, but recommended), there are a lot of pieces to this tent. If you do not have a large canvas bag on hand to store this in, plan to add their storage bag to your cart.
How to Choose a Hot Tent
Purpose
There is a surprisingly wide variety of hot tents on the market, ranging from models that you could use for a glamping setup to lightweight designs appropriate for backpacking, rugged spacious models built for hunting camps, and more. The models we tested for this story only account for a fraction of what these brands offer (Nortent, in particular, has a wide range of stove-compatible tent designs). If you don’t see the perfect tent for your needs in this story, chances are one of these brands carries it.
Stove Compatibility
Most hot tents are simply tents built to house a wood-burning stove; often, you’ll need to purchase the stove separately. In some instances you may be able to mix and match stoves with tent brands, but not always.
Interior Space
Not only do wood-burning stoves take up a fair amount of space inside of a hot tent, you also need to give yourself a buffer around it for safety. Even accidentally brushing up against the side of one of these is enough to burn you. Plan for more interior space than you think you need when making a hot tent purchase.
FAQs
A hot tent is a tent that is designed to be paired with a wood-burning stove. They typically do not have floors and do have stovepipe openings.
Hot tents do not have floors because the high heat of the stove can melt the floors. Several of the tents I looked at, including the Nortent Gamme 6 and the Snowtrekker Shortwall, did have options to include partial floors or additional materials that could be used to prevent the heat of the stove from melting the floor.
After testing numerous hot tents in significant downpours in the Pacific Northwest without incident, I’m confident saying that yes, hot tents are waterproof. The biggest fail point for a hot tent is the stovepipe opening. There was water dripping through the hole around the stovepipe opening in the Snowtrekker Shortwall that I tested.
Final Thoughts on the Best Hot Tents
After testing different hot tent models in rain, wind, and snow, I’m impressed by the variety and quality of designs from Nortent, Springbar, Seek Outside, and Snowtrekker. If you’ve been hesitating on purchasing a hot tent for use in the shoulder season and beyond, any of the options on this list would be a great place to start your hot tent journey with.
Read the full article here


