7 Ingenious Ways to Heat Your Home This Winter
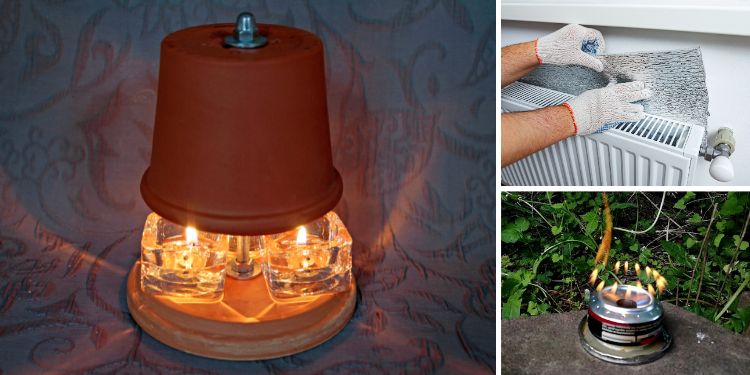
Winter is upon us, and with it, frigid cold weather and higher heating bills.
Even though winter is usually a time to look forwad to thanks to the Christmas season and the fun we can have in the snow, it also always brings with it a list of concerns that those living on off-grid homesteads have to contend with.
Those living on the grid may seek alternative means of heating thier homes to help lower their monthly heating bills, while those living off-the-grid face the no-less difficult challenge of keeping their homes warm when their normal heating methods may not be enough.
Here are seven ingenious DIY ways to heat up your home this winter:
Caulk the Windows and the Doors
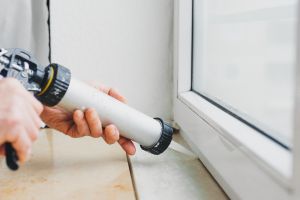 There are two places in your home that are the most vulnerable for letting cold air seep into your home (or allowing warm air to escape), and these are your doors and windows.
Before winter, add or check the caulk over the windows and doors to ensure the seal is tight.
Weatherstrip the Doors and Windows
As an alternative to caulking, you can weatherstrip the doors and windows instead. If you already have weatherstripping, look for tips and tears that could be letting any cold air in.
Use Soft Rugs
While making sure to your doors and windows are properly sealed is smart for keeping, a commonly overlooked place in any home for is the flooring.
Related: The First Thing You Should Do in a Winter Blackout
Regardless of whether you have hardwood floors, tile, or carpet, consider investing in soft rugs that you can lay out over the floors. Not only are soft rugs more comfortable for your feet, they will also help your feet to be warmer as well
Build a DIY Stoneware Heater
A DIY stoneware heater is very easy to make and can help provide warmth to a room in your home.
Gather the following items: ceramic pot, fan, tray, candles, wax or glue, four bricks, matches or lighter.
Now follow these steps:
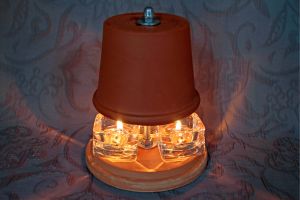 Place your candles on a tray and stick them upwards (this is why using wax or glue is helpful if you’re using birthday cake style-candles, otherwise candles in jars or cups work just fine)
- Position two of the bricks on their long sides next to the tray on the right and the left
- Position the other two bricks behind the tray on their short sides sticking upwards, to form a wall behind the tray
- Position your fan on top of the back two bricks that form the wall
- Light your candles on the tray
- Place the ceramic bowl over the tray, and make sure it’s leveled on the bricks on the right and left so it won’t crush the candles on the tray (the bowl should be in front of and underneath the fan)
- Switch on the fan
And that’s it! The ceramic bowl will start to emanate heat generated from the candles inside, and the fan will help redirect the heat into the rest of the room.
Make A Penny Can Stove
A penny can stove provides a small but reliable source of heat. You can also assemble penny can stoves using items you may already have in the form.
Start by gathering the following items: empty soda cans, rubbing alcohol, pushpins, hammer,sharpie, knife or scissors, nail, wrap insulation kit, coin (quarters work best), lighter.
Related: How to Make Your Own Rocket Stoves (Tin Can & Long Burner Rocket Stoves)
Once you have those items, follow these steps:
 Turn one of the soda cans upside down
- Drive a nail through the middle of the bottom of the can
- Now punch four holes around that center hole using the push pins
- Punch sixteen more holes around the bottom of the can, again using the push pins
- Take your marker and draw a line around the circumference of the can right in the middle
- Use your knife or scissors to cut evently along the line; this will create two halves of the can
- The (A) bottom part of the can (with the punched holes) will go on top of the (B) other piece of the can
- Take the pipe rap insulation and place it into the B piece of the can
- Now assemble the can by placing the A part of the can over the B piece
- Pour the rubbing alcohol through the center hole that was created with the nail
- Ignite the fuel using a lighter
- Place a coin over the middle hole, so the flames jet outside of the circumference hoels created by the punched holes
And that’s it! You can hold your hands directly over the flames (but not too close!) to help get warm. You can also try cooking certain kinds of foods, such as hot dogs, over the flames as well.
Consider making multiple penny can stoves and then set them aside in your pantry or cupboard so you can pull them out to use at a later date. The idea is you want to have a few penny can stoves ready to go.
Reflect The Heat From Your Radiators
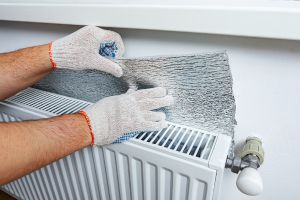 This is an easy DIY method for redirecting heat into your home.
Take sheets of aluminum foil and tape them to the wall behind your radiator.
This will reflect the heat generated by the radiator back into the room.
It really is that simple.
Indoor Fire Pit
If there was a method for safely adding an indoor fire pit to your home, would you do it? As it turns out, there is such a way.
Gather these items to start:
- Ceramic Container (make sure it’s fire resistant)
- Candle Holder (make sure it’s built out of glass)
- Rocks (go with fire safe rocks suc has marble, granite, or lava rocks
- Bioethanol
- Lighter
Once you have those items, follow these steps:
- Place your candle holder into the middle of the ceramic container
- Now your rocks into the ceramic container surrounding the canlde holder and layer them appropriately; you don’t want the rocks to be packed together too tightly (the idea is that there should be airflow in between the rocks
- Pour bioethanol into the glass holder (this will serve as your fuel)
- Light up the bioethanol
And that’s it! The bioethanol will burn and the rocks will gather the heat created by the flames, before emiting it out into your room for warmth. The larger the container and candle holder, the larger the flame will be (but for safety purposes indoors, go with a smaller container).
The above methods may seem simple, but that’s a good thing. They each require very limited resources and don’t require you to be a skilled handyman to complete them.
As winter approaches, off-grid living becomes even more challenging, especially when it comes to heating your home. While DIY methods like using penny can stoves, stoneware heaters, and reflecting heat from radiators are great short-term fixes, they can only do so much. For those looking for a more reliable and long-term solution, The Modular Backyard Power Plant could be the game-changer you need.
This simple, scalable DIY project allows you to build your own solar-powered generator right in your backyard. You can generate heat and power for your home—without relying on propane or fire hazards. Not only will this help with winter warmth, but it also ensures you’re ready for any emergency, making it a must-have for off-grid living.
Plus, the guide walks you through every step with videos and material lists, so you don’t need to be an expert to get started. Grab your guide today before the limited edition runs out!
You may also like:
 The Most Realistic Prepper TV Series You Need to Watch
5 Types of Wood You Should NEVER Burn! (Video)
I Tried to Eat My Emergency Foods and This Is What Happened
12 Items That Are Still Good After They Go Bad
Better Than a Faraday Cage
Read the full article here


