

Low back pressure suppressors have revolutionized the shooting experience for modern sporting rifles by reducing gas blowback, recoil and noise while maintaining accuracy and performance.
However, many newer firearm enthusiasts are surprised to learn that most modern low back pressure suppressors are sealed units designed to minimize internal maintenance.
Unlike some older or specialized user-serviceable models, these sealed suppressors cannot—and should not—be disassembled by the user. Despite this design, it’s important to understand what maintenance is needed to ensure optimal performance and longevity.
This guide will walk you through the appropriate steps for cleaning and maintaining your sealed low back pressure suppressor, helping you preserve your investment for years to come.
Understanding Sealed Suppressors
The sealed design of most low back pressure suppressors represents advancements in suppressor technology. Many manufacturers have moved toward this design approach for several reasons.
Sealed units prevent user error during reassembly, which can lead to baffle strikes, misalignment, and potentially catastrophic failures. They also maintain precise internal geometry that optimizes sound reduction and minimizes point-of-impact shifts. Additionally, sealed construction often allows for stronger, lighter materials and enhanced durability under extreme firing conditions.
First identify if your suppressor needs to be cleaned. Rifle suppressors that chamber high pressure rounds like 5.56 and 7.62 NATO don’t really need to be cleaned. The high pressure that the gun creates will throw out most debris and carbon. For example, Dead Air recommended that users clean their LAZARUS 6 suppressor after every 4,000 rounds.
However, it’s important to recognize that “sealed” doesn’t mean “maintenance-free.” While you won’t be scrubbing individual baffles, there are still important maintenance procedures that will extend the life of your suppressor and ensure consistent performance. The key is understanding what maintenance is appropriate and the signs to look for.
External Cleaning Procedures
Despite being sealed, the exterior low back pressure suppressors such as the SilencerCo Hybrid 46M requires regular attention. After each use, allow the suppressor to cool completely before handling. Safety should always be your primary concern when working with recently fired firearms and accessories.
Once cooled, use a clean, dry cloth and gun oil to wipe down the exterior, removing any carbon buildup, powder residue, or other debris. For more stubborn deposits, lightly dampen the cloth with a gun-specific solvent. Be careful not to saturate the cloth, as excess liquid could seep into the suppressor through the muzzle or mount threads.
For thread cleaning, use a nylon brush or cotton swab lightly moistened with solvent to clean the threads on both the suppressor and the barrel. Thread cleanliness is critical for proper alignment and preventing carbon locking.
After cleaning, apply a minimal amount of high-temperature thread grease specifically designed for suppressors. This helps prevent seizing and makes future removal easier, especially after high-volume shooting sessions when carbon welding can occur.
Internal Cleaning Best Practices
For a sealed suppressor, you have to dissolve the carbon and lead away, then let the unit dry before shooting it again. While you can’t do as much cleaning as you can do with a sealed or fully welded suppressor cleaning the internals is fairly simple. You can soak them in solvents and continually soak and dump until carbon stops flowing out.
To reduce the solvent I use, I prefer to seal one end of the can and fill the other with solvent. Let the solvent sit overnight, then dump it. A few rounds though the can will kick out any dislodged debris and you should be good to go. Be aware, some cleaning solvents can remove the finish on a suppressor. That’s why I prefer not to soak the outside of the suppressor in the solution.
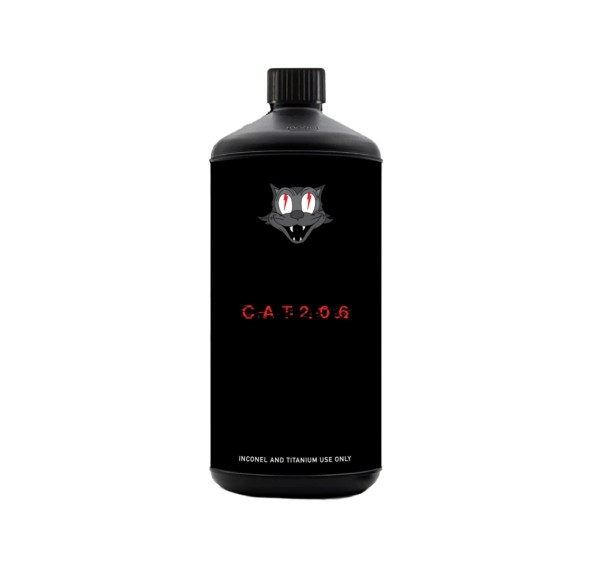
There are Harsher solutions like CLR or “The Dip” can damage your finish. C.A.T 206 is a synthetic acid-cleaning solvent designed to work with titanium and Inconel silencers only. HUXWRX developed Suppressor Sauce to make cleaning sealed suppressors simple. Suppressor Sauce is a multi-stage cleaning soak; Part A removes carbon, while Part B removes heavy metals like lead and copper.
You can also run a cleaning brush through the suppressor to forcefully get the carbon out of the can. Make sure to properly research your solutions before using them to clean your suppressor.
Mounting and Dismounting Practices
Proper mounting and dismounting procedures are crucial for maintaining both your suppressor and your firearm. Always verify that your firearm is unloaded and safe before attaching or removing a suppressor.
When mounting, ensure the threads engage properly and tighten the suppressor according to the manufacturer’s specifications. Many suppressor issues stem from improper mounting, which can cause misalignment leading to baffle strikes or accuracy problems.
For quick-detach models such as the Dead Air Mojave 9, regularly inspect the locking mechanism for carbon buildup or wear. These systems rely on precise engagement to maintain alignment, and even minor debris can affect performance. When removing the suppressor after firing, be aware that it may be extremely hot.
Allow sufficient cooling time or use a suppressor cover or heat-resistant gloves. If the suppressor seems stuck, don’t force it—this could damage the threads on both the suppressor and your barrel. Instead, apply a penetrating oil specifically designed for firearms to the junction and wait for it to work before trying again with moderate force.
Regular Inspection Protocols
While you cannot inspect the internal components directly, regular external inspections can reveal much about your suppressor’s condition. After cooling and before cleaning, examine the suppressor under good lighting. Look for any signs of damage, warping, or unusual wear patterns. Pay particular attention to the mount area and muzzle end, as these areas experience the most stress during firing.
Check for any unusual discoloration that might indicate overheating or material fatigue. Some color changes are normal, especially with titanium suppressors, but dramatic or uneven changes may signal a problem. Listen for any rattling sounds when you gently shake the suppressor. While some movement of the internal parts in certain designs is normal, excessive rattling could indicate baffle damage or erosion requiring professional attention.
Professional Service Indicators
Despite their sealed nature, all suppressors eventually require professional service. Knowing the warning signs can help you avoid failures or performance degradation. If you notice a significant change in sound suppression, point-of-impact shift, or visible flash increase, these could indicate internal damage or carbon buildup affecting performance. Similarly, if you experience accuracy problems that weren’t present before, the suppressor may need professional attention.
Most manufacturers recommend sending your suppressor in for inspection after a specific round count, typically between 5,000 and 10,000 rounds depending on caliber and usage patterns. High-volume shooting, particularly with short-barreled firearms or certain calibers, may necessitate more frequent professional service.
Also, remember that you’ll likely burn up multiple barrels before you need to send a silencer back to the factory for any kind of service or repair work. Most don’t even need much in the way of cleaning, or at best, a quick solvent bath every now and then. When in doubt, look at your owners manual or contact the manufacturer for guidance specific to your model and usage pattern.
Storage Best Practices
Proper storage can significantly impact suppressor longevity. Store your suppressor in a cool, dry environment to prevent corrosion and material degradation.
Many enthusiasts mistakenly believe sealed suppressors are immune to environmental damage, but moisture can still affect external surfaces and mounting interfaces. Consider using a silicone-treated gun sock or storage case with desiccant packets to control humidity.

For long-term storage, some manufacturers recommend applying a light coat of gun oil or protective spray to the exterior, carefully avoiding the internal bore. If your suppressor uses quick-detach mounts or has separate mounting systems, store these components properly, keeping track of any specific spacers or timing devices that ensure proper alignment.
Conclusion
While most low back pressure suppressors are sealed units that cannot be disassembled for user maintenance, proper care remains essential for optimizing performance and longevity.
Focus your maintenance efforts on external cleaning, careful inspection, proper mounting procedures, and recognizing when professional service is needed. By following these guidelines and respecting the design limitations of sealed suppressors, you’ll maximize your investment and enjoy reliable performance for thousands of rounds.
Remember that suppressor technology continues to evolve, and manufacturer recommendations may change. Always defer to the specific guidance your suppressor’s manufacturer provided regarding maintenance intervals and approved procedures. When in doubt, consult with the manufacturer or a qualified gunsmith rather than attempting maintenance procedures that could compromise your suppressor’s integrity or safety.
Your low back pressure suppressor will provide years of reliable service and shooting enjoyment with proper care.
Read the full article here


