Five Keys to Choosing a Weapon Light

Putting a weapon light on a firearm provides an instant boost to its utility. It allows you to operate better in the dark and in low-light conditions, which is when bad things tend to happen. Whether you’re dealing with something as serious as a home invasion, following up a wounded animal, or chasing hogs in the middle of the night, a gun-mounted light is a great accessory.
This guide details the options to weigh when picking an illumination tool, to use the fancy industry term for a flashlight. Take them into consideration before you buy, and you’ll end up with the right weapon light for your firearm. The qualities to consider are:
- Brightness and illumination pattern
- Batteries and run time
- Size and profile
- Mounting options
- Controls
Carbine Lever-Action and Surefire Lights
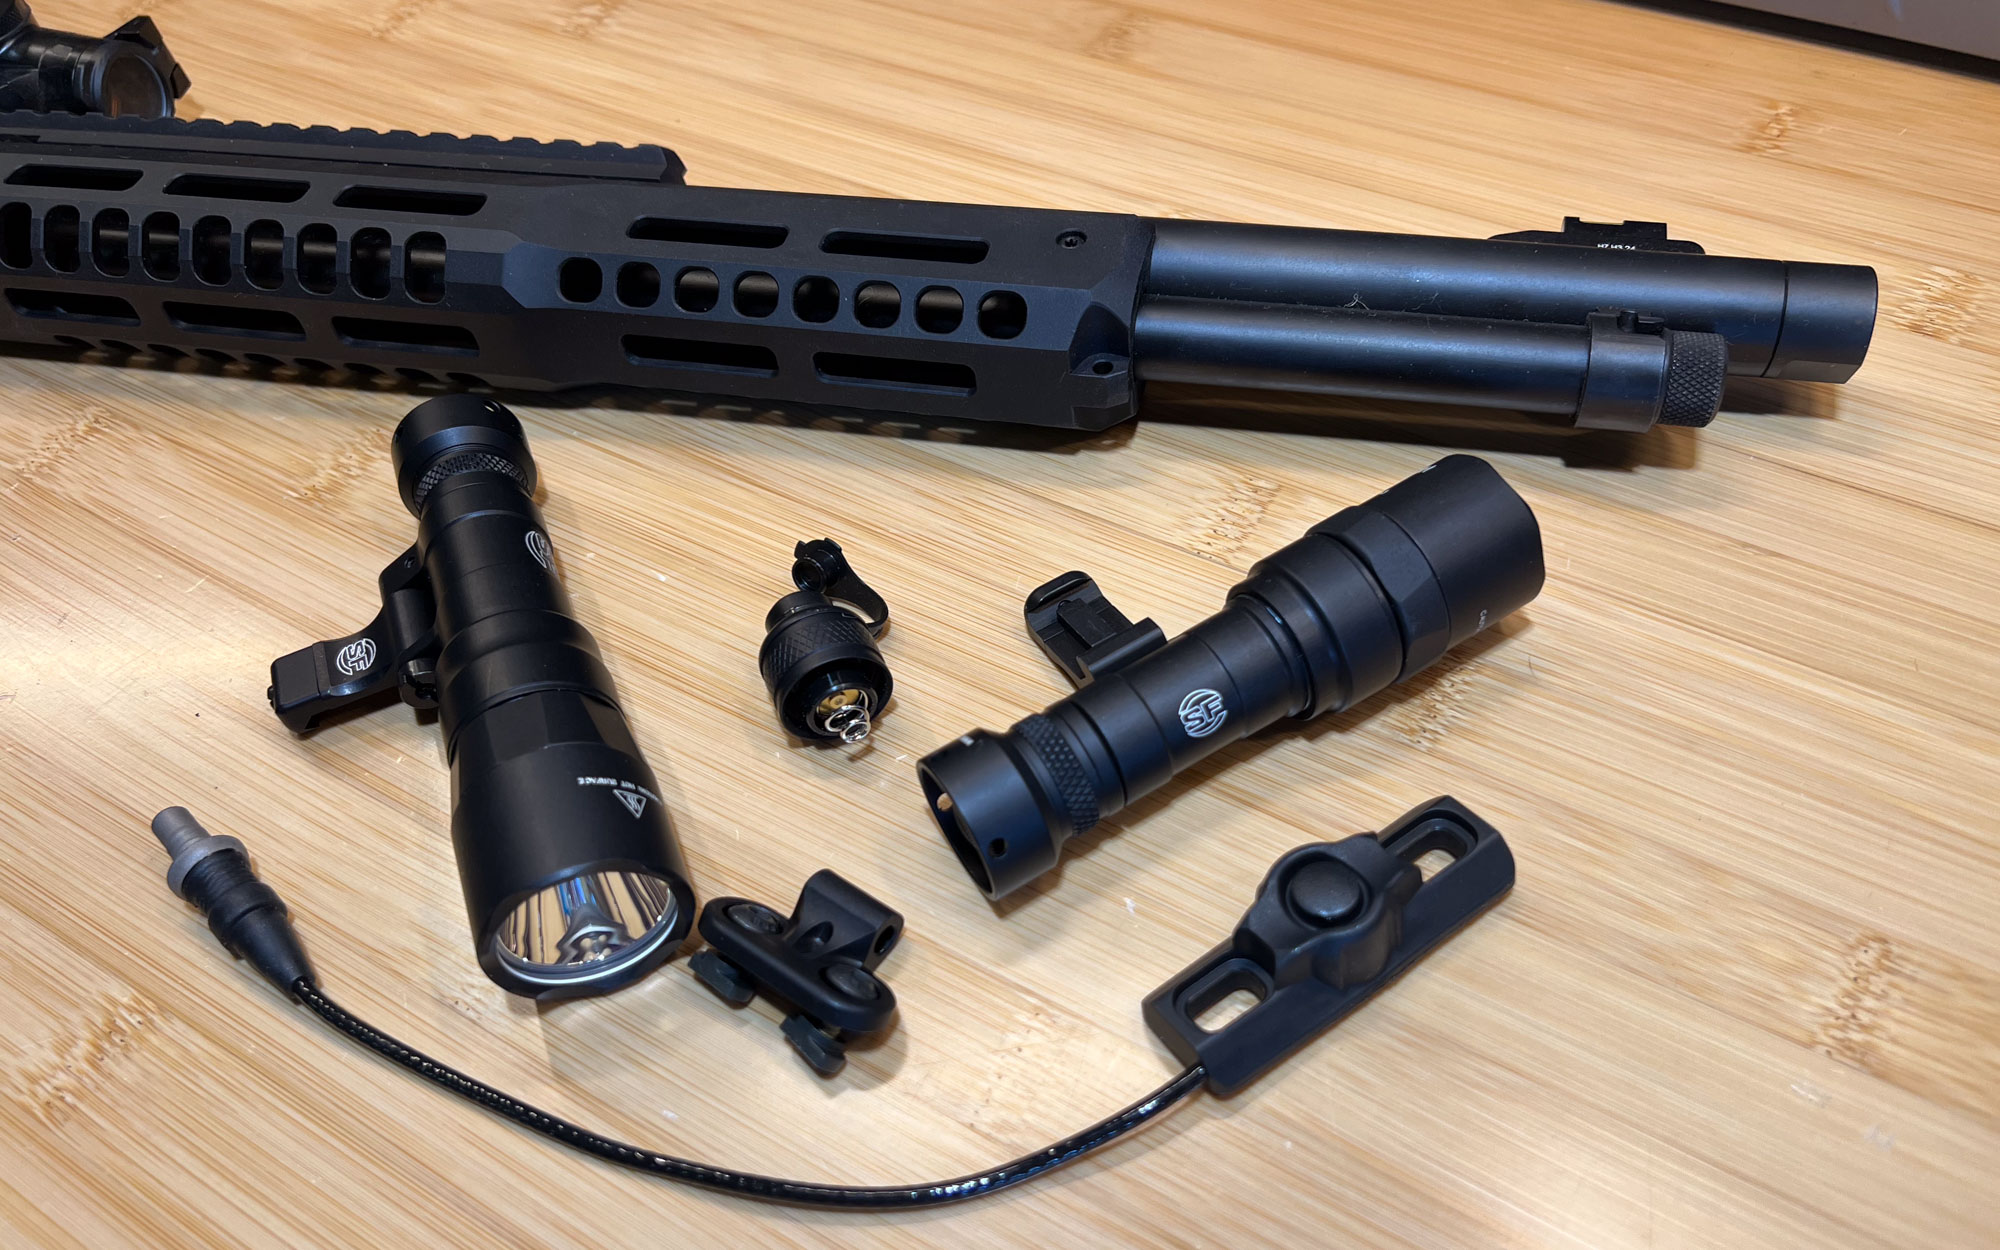
To avoid over-complicating this, I’m contrasting two lights from Surefire that are designed for long-guns — specifically the Mini Scout Light Pro and Turbo Scout Light Pro. The host platform is a Smith & Wesson Model 1845 carbine in .44 Remington Magnum, but these lights would be equally at home on an AR-type rifle or defensive shotgun.
All this information applies to weapon lights for handguns as well, though if it is a carry gun you need to make sure it works with the holster you plan to use.
Brightness and Illumination Pattern
Two key measurements with any light are its lumen and candela values. In simplified terms, lumens correspond to how much light a source emits, while candelas signify the light’s intensity. The more narrowly focused a light is, the more candelas it produces. All things being equal, a 1000-lumen light will outshine a 750-lumen unit, though the less powerful light can appear brighter if those lumens are more tightly concentrated.
For outdoor applications you can’t have too much light on tap — but when operating indoors it is possible to blast out your vision by deploying one that’s too bright, especially if the walls in the room are white or lightly colored.
A counterargument to this is that when dealing with an adversary who is also using a light, the brighter weapon light wins, and the person with the less powerful illumination will be blinded.
The Mini Scout Light Pro emits 500 lumens with a peak beam intensity of 7,600 candelas and has, what Surefire refers to as, a hybrid beam pattern that delivers ample spill light. This allows for good PID (short for positive identification) at medium and long ranges — a critical quality to assess who or what you’re looking at — while letting you maintain good situational awareness.
The Turbo Scout Light Pro is more powerful (650 lumens) with a 95,000-candela peak beam intensity, casting its light in a tightly focused manner to overwhelm the target.
Batteries and Run Time
Brighter lights often need bigger, or more, batteries to operate. Without extra juice fueling them, run time is diminished.
This encapsulates one of the key tradeoffs to weigh when picking any light, whether it is going on a firearm or handheld.
The weapon lights that we’re using in this example demonstrate this perfectly. The 500 lumen Mini has a 1-hour run time using a single CR123 battery, while the more potent Turbo has a 45-minute run time with a larger 18350 battery.
So you have to ask whether the shorter run time (and larger profile — more on that in a bit) is worth it?
Now the Turbo Scout Light Pro is a dual-fuel unit, so you can stick a CR123 in there and it’ll work, though the lumens drop to 350 with a 1-hour run time. While it is convenient to be able to use a different battery — it is one of the things that really draws me to the Turbo — you can see that you give up a lot of efficiency when doing so.
One great thing about the 18350 battery, however, is that it is rechargeable via a Micro USB port, and the Surefire light comes with a charging cable for that purpose, in case you ditched all your old ones.
Size and Profile
The Mini Scout is smaller than the Turbo. It uses the tinier CR123 battery and has a narrower body diameter. It also uses a smaller bezel. For the Turbo Scout to create its concentrated beam pattern it requires a beefier head.
Neither of these lights are what I’d consider bulky, but if minimizing the silhouette of your firearm is important, then the Mini Scout Light Pro has the edge.
Weapon Light Mounting Systems
Weapon lights typically employ either a Picatinny mount — which is the most common — or use M-Lok hardware. These lights come with both.
By virtue of its single screw, the Picatinny mount is easier to use, and is handier if you plan to swap a single light among multiple firearms. The M-Lok system is slightly more complicated to attach, but sits more snugly against the firearm, reducing its profile.
These mounts also have a handy hinge that lets you place the light in your preferred position, which can either be tight against the mounting point or swung outward and lifted slightly off the gun. The hinge has a single screw that lets you set the desired tension and removing the screw is how you transfer the light between the M-Lok and Picatinny hardware.
Because of the configuration of the attachment points on my lever gun, the Picatinny mount was a better choice. I didn’t like how cramped the fore-end became with the light attached to the M-Lok slots.
That said, with the hinge in the closed position on the Pic rail, the light sits right in front of my red-dot, blocking my view. By swinging the light off the rail and to the side I’m able to see through the sight while having enough room for my hand on the fore-end.
Being able to place the light in this ideal spot showcases the utility and versatility of this mounting system.
Weapon Light Controls
All lights have some kind of button or lever to activate them. These Surefire units come with a tail cap with a raised edge that surrounds and protects the on/off button.
A full press on the button toggles the light with a click between on and off, while moderate pressure provides momentary illumination. The rim around the button minimizes the chance of something contacting and triggering the switch at an inopportune time.
I’ve used this tailcap control on a number of my weapon lights and like it a lot, but you can also replace it with a remote switch, which is what I did here.
This switch pad is a momentary on button that attaches to a length of cable that plugs into the back of the light. This can be more ergonomic than the click tailcap, though you need to keep your finger on the button to make the light work. (You can also get a remote pad with constant- and momentary-on/off functionality.)
The remote switch was unquestionably the better option on this carbine, but the pad-and-cable setup is one more thing to potentially go wrong.
When I can mount a light so the tailcap sits comfortably under the thumb of my lead (left) hand, that’s my preference, as it aligns with my less-is-more approach to configuring a gun. But in many cases, a remote switch, and the flexibility it provides, is the way to roll.
Final Thoughts on Mounting a Weapon Light
A quality weapon-light isn’t cheap, so it is worthwhile to mull over these considerations before parting with your money. While Surefire, which is admittedly spendy, might be out of your budget, their modular ecosystem that allows you to mix and match components is a great resource.
By weighing these factors — brightness, power source, run time, mounting hardware, on/off controls, and size/profile — you can zero in on your ideal illumination system and spend accordingly.
Read the full article here


